
Wooden Preschool Furniture Care Guide For Busy Classrooms

Wooden preschool furniture takes repeated spills, art materials, room changes, and cleaning. A useful care plan starts with the exact construction and the way your staff clean, move, report, and reorder parts. This wooden preschool furniture care guide combines current hygiene guidance with the material, packing, and after-sales issues we see in project reviews, so you can protect the finish and remove unsafe furniture at the right time.
Check The Material And Finish
Before you choose a cleaner, identify the furniture’s substrate, surface finish, and exposed edges. “Wooden furniture” is too broad to guide maintenance. A solid beech chair, a varnished birch plywood shelf, and a plywood table with a laminate top may all look similar but need different treatment.
When you review a product specification, separate these four details:
| What To Confirm | Why It Changes Care | What You Need From The Supplier |
|---|---|---|
| Solid wood, plywood, MDF, or another core | Moisture affects each construction differently, especially at edges and fastener holes | Exact material for the top, sides, legs, back, and shelves |
| Lacquer, paint, clear coat, laminate, veneer, or oil finish | The finish determines which cleaners and repair methods are suitable | Finish name, care sheet, and chemical restrictions |
| Sealed, banded, or exposed edges | Edges and drilled holes are common paths for liquid to reach the core | Edge treatment and instructions for damaged areas |
| Fixed hardware, adjustable feet, glides, or casters | Moving parts create additional inspection and replacement points | Hardware list, tightening instructions, and spare-part options |
When we review a classroom furniture schedule, we do not treat “wooden” as a usable maintenance specification. The same room may contain birch plywood shelving, beech or rubberwood furniture, laminate tops, and painted panels. We separate the substrate, finish, edges, and hardware before recommending care because products that look similar may not tolerate the same moisture, chemicals, or repair method. If you are still selecting materials, compare solid wood and plywood for preschool furniture before approving the finish.
Follow A Simple Daily Cleaning Routine
For a mixed furniture package, group the cleaning routine by finish, not by room. Two products in the same classroom may need different cleaners even if both are sold as wooden furniture. Keep one approved instruction for each finish group and record any product-specific exception. Then use the least aggressive method that removes the soil and meets your center’s hygiene procedure:
- Remove crumbs, sand, and dry art material with a soft cloth or soft brush. Grit left under a wet cloth can scratch a finish.
- Wipe the surface with a soft cloth dampened with a cleaner approved for that exact finish. The cloth should transfer enough solution to clean the surface without leaving liquid around edges or joints.
- Give high-touch points separate attention, including table edges, chair backs, handles, cubby openings, and caster controls.
- Dry standing moisture and inspect seams, underside edges, and hardware recesses before the furniture returns to use.
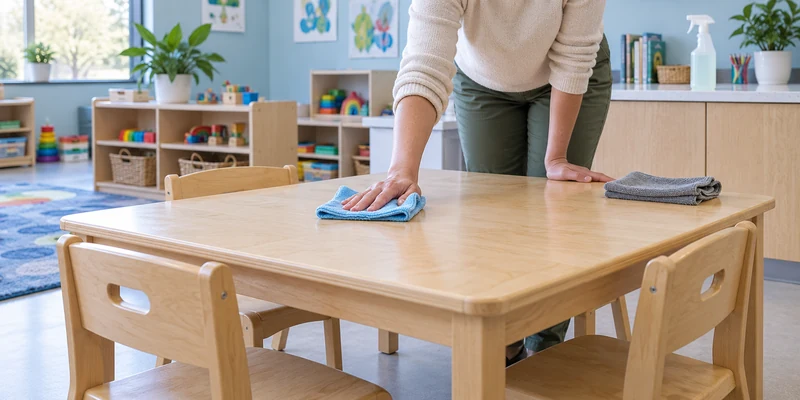
Cleaning removes dirt and many germs, while sanitizing and disinfecting are used for specific surfaces or illness situations. The activity tells you which hygiene step is required; the furniture specification tells you what the finish can tolerate. You need both answers before staff choose a product. Clean first because soil can reduce the effectiveness of the next step.
Do not build your routine around a homemade recipe simply because it is described as natural. Vinegar, baking soda paste, bleach, alcohol, steam, and furniture polish can affect finishes in different ways. Use the furniture care sheet, the chemical label, and your local childcare requirements together.
Use Sanitizers And Disinfectants Carefully
A disinfectant is suitable only when its label covers the intended use and the furniture finish can tolerate the required application. Check the product label for surface type, dilution, application method, contact time, rinsing, ventilation, protective equipment, and storage.
Keep the surface visibly wet for the full contact time shown on the disinfectant label. Product descriptions such as “water-based paint” or “easy-to-clean surface” do not prove compatibility with a particular disinfectant. In our specification reviews, we treat the disinfectant label, the furniture care sheet, and the local hygiene procedure as three separate checks. If the finish cannot tolerate the full labeled application, choose a compatible product. Do not shorten the contact time to protect the finish.
Apply chemicals when children are not close to the work area, follow your facility procedure, and keep products in their original labeled containers out of children’s reach. Never mix products unless the label specifically instructs you to do so.
Handle Spills Before They Reach Edges And Joints
Act on spills while the liquid is still on the finish. Blot the spill, remove sticky residue with the approved cleaner, then dry the surface. Check nearby seams, screw holes, edge banding, and the underside of the panel; the tabletop alone does not show whether liquid reached the core.
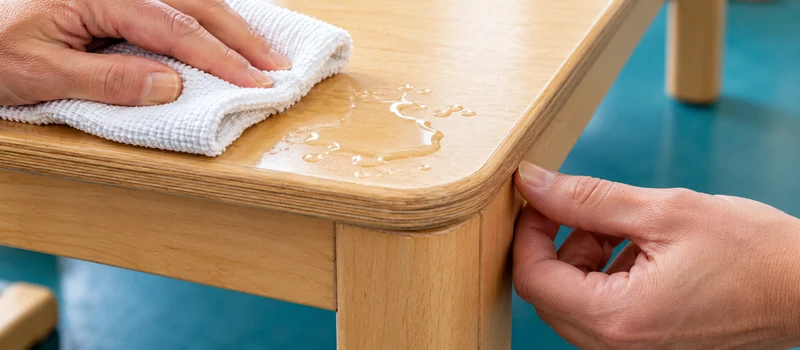
Wood absorbs and releases moisture as surrounding conditions change, which can affect its dimensions. A coating may slow moisture movement, but it does not make every wooden product waterproof. Moisture wording also appears frequently in furniture specifications, yet a product-level claim does not tell you which components are protected. Our review rule is to confirm the top, underside, edge banding, drilled holes, and joints separately. That detail determines whether a spill needs routine drying or the item should be isolated for inspection.
Use the spill location to decide what happens next:
- A spill on an intact sealed top usually needs cleaning, drying, and a quick finish check.
- Liquid that reaches an exposed edge, open fastener hole, damaged coating, or delaminated area needs closer inspection.
- Swelling, a raised veneer, a soft edge, persistent odor, or a rough surface means the item should leave the children’s area until you know whether it can be repaired.
For art and sensory activities, use trays or washable work mats where the manufacturer permits them. Protection works best when staff can remove and clean it without trapping liquid against the furniture.
Inspect Hardware, Edges, And Joints
Cleaning staff see surfaces; teachers notice movement; maintenance staff understand fasteners. Your inspection routine should connect all three observations in one record. A note such as “loose wheel” is too vague for a reliable repair or replacement request. Record the room, product or model, full-item photo, close-up of the connection, affected quantity, and whether the surrounding panel is still sound.
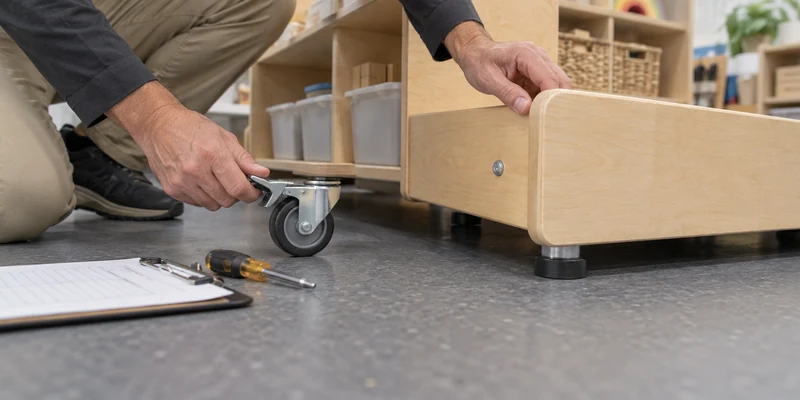
Use this inspection rhythm as a starting point and adjust it to use level, manufacturer instructions, and local licensing rules:
| When To Check | What To Look For | Immediate Action |
|---|---|---|
| Before the room opens | Wobble, splinters, sharp exposed edges, loose casters, standing moisture | Remove the item from use if a child could reach the defect |
| After a spill or room move | Wet joints, damaged edge banding, shifted shelves, unlocked or loose casters | Dry, isolate, and inspect before returning it |
| On your scheduled maintenance round | Fasteners, glides, hinges, caster locks, anchors, finish cracks, and repeated stains | Tighten only as instructed; log parts or repairs needed |
| When receiving a new shipment | Transit damage, missing hardware, finish defects, assembly accuracy, and item stability | Photograph and report defects before the room starts using it |
Keep carton labels and receiving photos until the order has been checked and assembled. In the project records we review, packing or delivery details and damage questions often need to be resolved together. Photos taken before assembly help separate transit damage from an assembly issue or later classroom use.
Do not keep tightening a joint that repeatedly comes loose without finding the cause. The fastener, insert, panel, or assembly may be damaged. A detailed maintenance record helps the supplier decide whether you need an adjustment instruction, a specific part, or a structural assessment.
You can use the checks in the preschool furniture safety guide to connect maintenance findings with your wider classroom inspection.
If you need help reviewing material, finish, hardware, and replacement-part requirements for a new project, share your room list and maintenance priorities:
Contact Our Team for More Information Get CatalogMove And Store Furniture Correctly
Dragging a loaded shelf can stress joints, glides, and casters. Empty storage units, lift fixed furniture, and use enough staff for the size and weight of the item. Lock casters during use and release them before a planned move.
Check the route before moving a large unit. Door thresholds, uneven floors, tight turns, and ramps can load one wheel or joint beyond normal classroom use. Keep the product ID and hardware list with the unit when it changes rooms; replacement requests are easier to verify when the part can be matched to the original specification. After repositioning the item, confirm that it sits level, the hardware is still tight, and any required wall restraint is correctly reinstalled.
Store indoor wooden furniture in a dry interior area with even support. Do not leave panels leaning where they can bow, place furniture directly on a damp floor, or wrap a wet item in plastic. Outdoor wooden furniture needs its own exposure, coating, drainage, and seasonal maintenance plan; indoor care instructions are not enough.
Decide When To Repair Or Replace
Appearance alone should not drive the decision. In our after-sales review, we separate four questions: Is the structure sound? Is the surface still smooth and cleanable? Is there an approved repair method? Is the exact replacement part available? This prevents a cosmetic mark from triggering an unnecessary replacement and prevents paint or tape from hiding a structural defect.
| Condition | Practical Decision |
|---|---|
| Surface mark with an intact, smooth finish | Clean with the approved method and monitor the area |
| Loose fastener with sound surrounding material | Remove from use, tighten or replace the part as instructed, then confirm stability |
| Splinter, peeling coating, sharp chip, cracked component, or exposed core | Remove from the children’s area until the part is properly repaired or replaced |
| Swollen panel, delamination, or a seam that cannot be cleaned | Ask for a replacement component or replace the item; do not cover the defect with paint or tape |
| Repeated wobble or a joint that will not hold | Stop using the furniture and have the structure assessed before deciding on repair |
For a repair request, provide the product or model, a full-item photo, a close-up of the failed area, and the part dimensions when relevant. A supplier cannot reliably select a hinge, caster, fastener, or panel from color and appearance alone. Touch-up color is not a structural repair. Sanding or refinishing can remove a protective coating, alter an edge profile, or conflict with the original repair instructions. Get the supplier’s repair method before altering furniture used by children.
Requirements vary by jurisdiction. Confirm current maintenance, sanitation, anchoring, and recordkeeping requirements with your local licensing or regulatory authority.
Include Care Requirements In Your Purchase
The most useful maintenance plan starts before the purchase order. Material, finish, packing, warranty, and replacement information can sit in different rows or documents during a project. Bring them into one care file for each product group before approval. When you compare preschool furniture, ask each supplier to quote the same care-related specification:
- material and finish for every main component;
- edge treatment and moisture-sensitive areas;
- approved cleaner, sanitizer, and disinfectant guidance;
- assembly and hardware-tightening instructions;
- replaceable glides, casters, hinges, handles, fasteners, and panels;
- finish repair method and actions that may affect the warranty;
- a finish sample or offcut for testing your facility’s cleaning products;
- packing and receiving instructions for bulk orders.

Material thickness can help you compare a structure, but it does not prove chemical resistance or service life. Ask for the evidence that matches the claim: finish specifications, test method and result when available, or written compatibility with the cleaning products you plan to use. This keeps a useful number connected to the decision it is meant to support.
If you are furnishing several rooms, use one approved material-and-finish schedule for each product group. Staff should not have to guess whether two similar-looking tables require different chemicals. Xiha Montessori can review your room list, finishes, replacement parts, and cleaning requirements as part of a classroom furniture plan.
If you want a furniture recommendation that accounts for room use, materials, cleaning, and future replacement parts, send your floor plan and purchasing requirements:
Contact Our Team for More Information Get CatalogAvoid These Common Care Mistakes
Using One Product On Every Wooden Surface
A product that works on laminate may haze a clear coat or penetrate a damaged plywood edge. Match the chemical to the finish and the hygiene task.
Spraying Directly Into Seams
Overspray can collect around edge joints, shelf pins, fastener holes, and caster plates. Use the application method approved by the product and furniture manufacturers.
Repairing Appearance While Ignoring Stability
Paint, markers, or tape can hide a visible defect without restoring the panel or joint. Remove the item from use when the defect affects smoothness, cleanability, or stability.
Waiting For A Major Failure
A small wobble, missing glide, loose hinge, or cracked coating is easier to handle when it first appears. Record the issue and assign the next action immediately.
Buying Without Care Information
If the supplier cannot identify the substrate, finish, approved cleaners, or replacement parts, you cannot build a reliable maintenance plan. Resolve those questions before you approve the order.
FAQs
How Often Should You Clean Wooden Preschool Furniture?
Clean visibly dirty furniture and follow the schedule required for the activity and your local childcare rules. High-touch tables, chair backs, cubby openings, and handles usually need more attention than low-touch panels. Set the frequency from actual room use; one interval will not fit every item.
Can You Use Disinfectant On Wooden Classroom Furniture?
Yes, when the disinfectant label allows the intended surface and the furniture manufacturer confirms that the finish can tolerate the full application, including contact time. Clean first and do not shorten the labeled procedure to protect the finish.
Is Vinegar Safe For Finished Wood Furniture?
Do not treat vinegar as a universal wood cleaner. Its effect depends on the coating, concentration, and exposure. Use the care sheet or written supplier guidance for the exact finish.
Can You Sand Scratches Out Of Preschool Furniture?
Only use an approved repair method. Sanding can remove a protective finish, change an edge, expose a plywood layer, or make the surface harder to sanitize. A splinter or deep scratch is a reason to remove the item from use until it is assessed.
When Should Wooden Furniture Be Replaced?
Replace it when the structure cannot be restored to a stable condition, the surface can no longer be cleaned, damaged edges remain accessible, or the required replacement parts are unavailable. A cosmetic mark on an intact finish does not automatically require replacement.
Should Outdoor Wooden Furniture Use The Same Routine?
No. Outdoor furniture faces rain, sunlight, ground moisture, and temperature changes. Follow the product’s outdoor coating and inspection instructions, and confirm drainage, anchoring, storage, and refinishing requirements separately.
Keep The Care Plan Practical
A reliable care plan connects three sources: your hygiene procedure, the exact furniture specification, and a maintenance record that supports repairs and replacement parts. Identify the construction, use finish-compatible products, dry edges and joints, and record defects with enough detail for the next action. When you need help matching materials, finishes, cleaning routines, and after-sales requirements across a complete classroom, Xiha Montessori can review the furniture plan with you.

Hey, I’m Roger, the founder of Xiha Montessori, a family-run business. We specialize in preschool furniture and educational solutions.
Over the past 20 years, we have helped clients in 55 countries and 2000+ preschools, daycares, and early childcare centers create safe and inspiring learning environments.
This article shares knowledge on making education more effective and enjoyable for children.

Wooden Preschool Furniture Care Guide For Busy Classrooms
Read More »
How to Childproof a Daycare Classroom: A Practical Safety Checklist
Read More »
Daycare Cribs Buying Guide: How to Choose Safe, Practical Sleep Furniture
Read More »
Object Permanence: What Babies Learn and How Montessori Activities Support It
Read More »
Effective Preschool Classroom Rules: How to Create a Safe and Orderly Learning Environment
Read More »
How to Start a Daycare: A Practical Planning Guide
Read More » Roger Cai
Education Specialists
Hey, I’m the author of this post.
Over the past 20 years, we have helped 55 countries and 2000+ Clients, like Preschools, Daycare, and Early Childcare Centres, to create safe and inspiring learning environments.
If you need a purchase or consultation, please contact us for a free product catalog and classroom layout design.